Using the NFC Ring with Android Smart Lock

Google’s Smart Lock functionality has been around for a while and allows you to unlock your device in several ways, including the use of NFC devices like the NFC Ring. Setting it up can be a slightly strange process so we thought we’d post up a quick how-to here.
Device used in this test: Nexus 5 Smartphone with Android 5.1.1 (kernel: 3.4.0-gbebb36b)
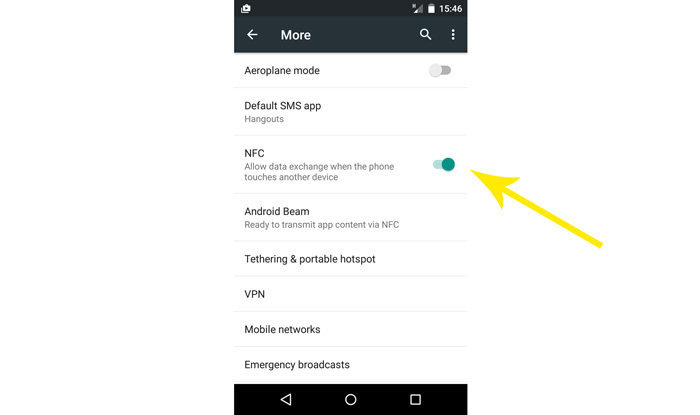
First, ensure that NFC is turned on. Head to Settings -> Wireless & Networks (More) -> NFC toggled on.
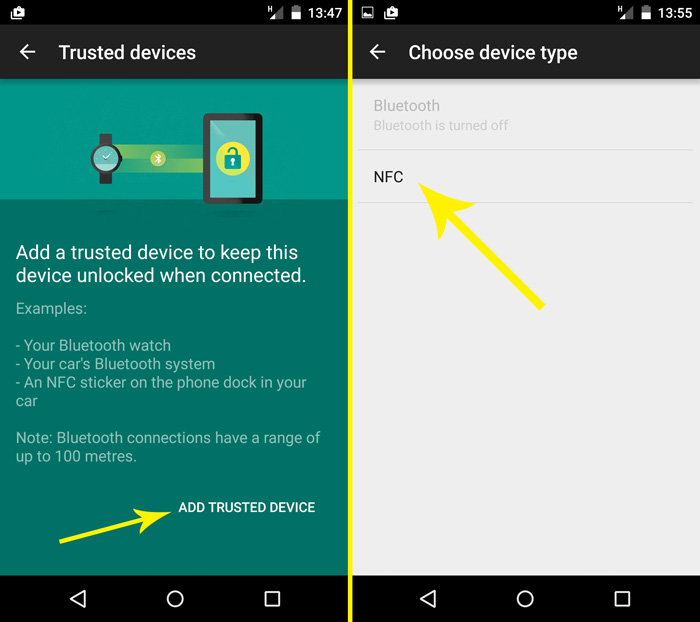
Next head to Settings -> Security -> Smart Lock. You will have to authenticate yourself with traditional code or swipe method. Then, navigate to Trusted devices -> Add trusted device -> NFC.
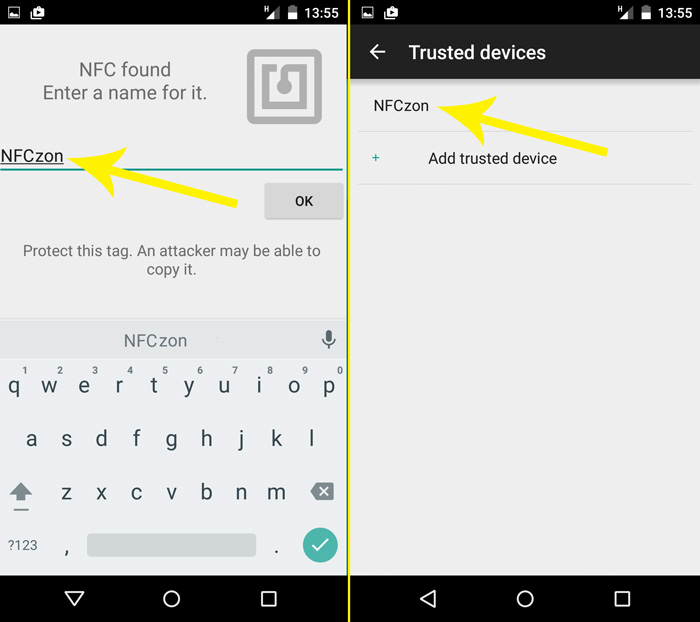 Scan your NFC Ring. Once scanned, you can name the tag for reference.
Your Ring is now a trusted device – meaning you can use it to unlock your phone.
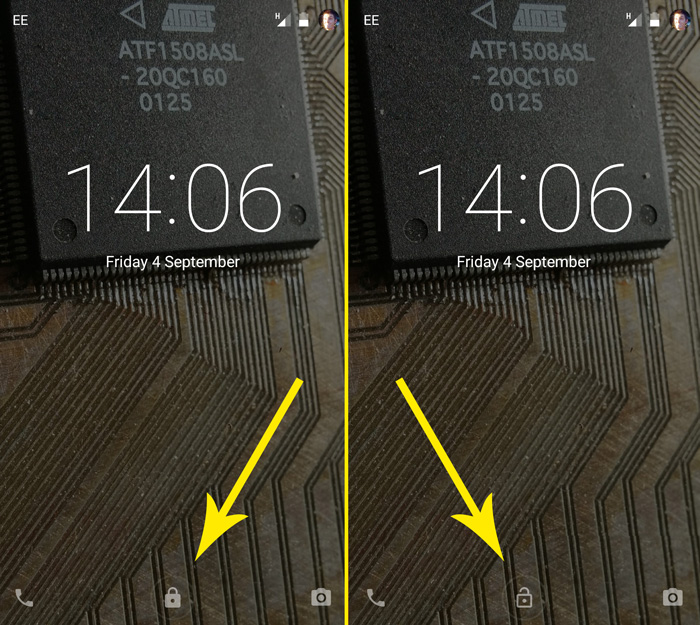 Lock your phone as normal. When the unlock screen is displayed, notice the padlock icon at the bottom. Scanning the NFC Ring will change this to an unlocked padlock icon and play a system sound to confirm. Your phone is now unlocked and you simply need to swipe upwards – as you would to access the keypad without Smart Lock – to gain access.
Note that it looks like the Smart Lock links ‘trusted devices’ to tag ID, rather than tag content. This means that you can change the content of your NFC Ring’s tag and it will still unlock your phone.